

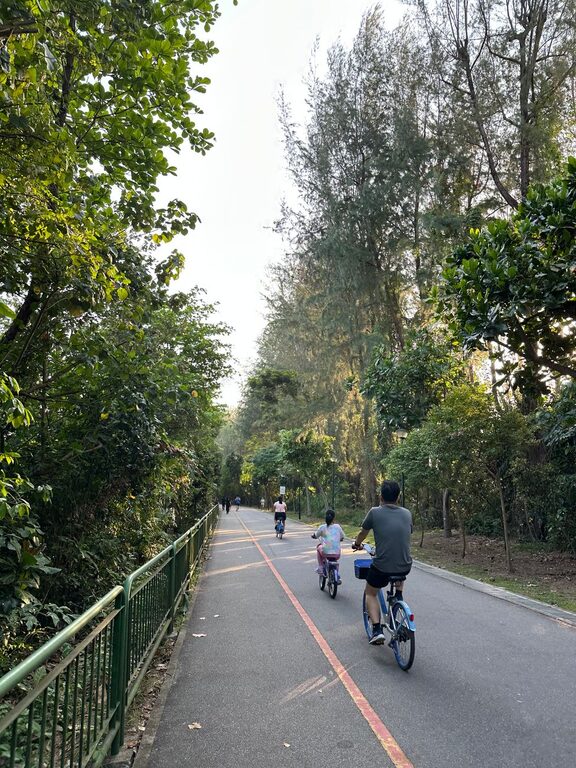
Exploring a local park by bicycle is an easy way to enjoy the outdoors, discover new paths, and add variety to your regular routine. Parks often offer quieter roads, paved trails, scenic views, and convenient places to stop for a break. You do not need an expensive bike or advanced riding skills to get started. With a little planning, a simple park ride can be comfortable, safe, and enjoyable.
Choose the Right Park and Route
Start with a park that matches your experience and comfort level. A smaller park with paved paths may be a better choice for your first ride than a large park with steep hills or rough trails.
Before leaving, check the park’s website or a local trail map. Look for information about:
– Trail surfaces, such as pavement, gravel, or dirt
– Route length and estimated riding time
– Hills, sharp turns, or narrow sections
– Restrooms, water fountains, and picnic areas
– Parking and access points
– Rules about bicycles and shared trails
– Temporary closures or construction
For a beginner ride, choose a route that is shorter than your maximum distance. A three- to five-mile loop can be a good starting point, especially if you are unfamiliar with the area. You can always extend the ride after learning more about the trail.
If the park has several entrances, select one close to the section you want to explore. This can save time and make it easier to return to your starting point if the weather changes or you feel ready to finish.
Check Your Bicycle Before You Go
A quick safety check can help prevent common problems during a ride. You do not need to be a bicycle expert. Spend a few minutes looking over the most important parts.
Use the ABC Check
The ABC check is a simple way to remember the basics:
– Air: Make sure both tires feel firm and are filled to the recommended pressure.
– Brakes: Squeeze the brake levers to confirm they work smoothly.
– Chain and Cranks: Check that the chain is in place and the pedals turn normally.
Also make sure the seat feels secure and is adjusted to a comfortable height. When sitting on the bike, you should be able to reach the pedals easily without rocking from side to side.
If the bicycle has gears, test them before entering the park. Shift while riding slowly on a quiet street or driveway. If the chain skips, the brakes feel weak, or a tire loses air quickly, have the bike checked before your ride.
Wear Comfortable, Practical Gear
You do not need specialized clothing for a short park ride. Choose comfortable clothes that allow easy movement and will not catch in the chain or wheels. Athletic shoes with closed toes are a practical option.
Useful items to bring include:
– A properly fitted helmet
– Water in a bottle or hydration pack
– A small snack for longer rides
– A phone for navigation and emergencies
– Identification and a payment method
– Sunscreen and sunglasses
– A light jacket if the weather may change
– A basic repair kit, if you have one
A repair kit may include a spare tube, tire levers, a small pump, and a multitool. Beginners may not know how to use every item right away, but carrying basic supplies can be helpful. You can also learn simple repairs through a local bike shop, community group, or beginner class.
Avoid carrying a heavy backpack if possible. A small handlebar bag, saddle bag, or lightweight backpack can keep your hands free and reduce discomfort.
Start Slowly and Warm Up
Begin your ride at an easy pace. The goal of your first park trip is to become familiar with the route, not to set a speed record. Riding slowly also gives you more time to notice signs, turns, pedestrians, and changes in the path.
For the first few minutes, focus on:
– Keeping a steady line
– Braking smoothly
– Shifting gears before hills
– Looking ahead rather than directly at the front wheel
– Relaxing your shoulders and hands
If you encounter a hill, shift to an easier gear before the slope becomes steep. Keep pedaling at a comfortable rhythm instead of using too much force. It is also perfectly acceptable to walk your bicycle up a difficult hill.
Plan at least one short stop during your ride. A bench, picnic area, or viewpoint can provide a good place to drink water, check your route, and enjoy the surroundings.
Follow Trail Etiquette
Local park paths are often shared by cyclists, walkers, runners, families, and people with pets. Good trail etiquette helps everyone feel comfortable.
Follow posted signs and stay on marked paths. Keep to the appropriate side of the trail, and pass only when there is enough space. Before passing, announce yourself clearly with a friendly phrase such as “Passing on your left.” Wait for a safe opening rather than squeezing through a crowded section.
Keep your speed under control, especially near playgrounds, intersections, blind turns, and busy entrances. Slow down when approaching people and be prepared to stop. If the trail is narrow or crowded, dismount and walk your bike until the path clears.
Be respectful of the park environment:
– Do not ride on restricted trails.
– Keep food wrappers and other items with you until you find a trash can.
– Avoid disturbing wildlife.
– Keep pets under control where allowed.
– Do not block benches, gates, or trail entrances.
– Leave plants, rocks, and natural features where you find them.
A small bell can be useful, but it should support—not replace—clear communication and careful riding.
Plan for Weather and Trail Conditions
Check the forecast before leaving, but also think about how recent weather may affect the trail. Rain can make dirt paths muddy and may cause puddles or slippery leaves. Strong winds can make open sections more difficult, while hot weather may increase the need for water and rest breaks.
Wear layers when temperatures are uncertain. If rain is likely, consider a shorter route close to your starting point. Avoid riding during storms or when visibility is poor.
Trail conditions can change quickly. Watch for loose gravel, tree roots, wet leaves, cracks, and fallen branches. Keep both hands ready on the handlebars and reduce your speed before obstacles rather than braking suddenly.
Use Navigation Without Losing Awareness
A printed map, park map, or phone app can help you stay oriented. Before starting, review the route and note major landmarks such as bridges, parking lots, restrooms, and trail intersections.
If you use your phone for directions, set up the route before riding. Do not hold the phone while moving. Stop in a safe location to check the map, or use a handlebar mount that does not block your view.
It is helpful to tell someone where you plan to ride, especially if you are exploring a large or unfamiliar park. Keep your phone charged and consider carrying a small portable charger for longer trips.
Build Confidence One Ride at a Time
After your first ride, think about what went well and what you would change. You may discover that you prefer early mornings, shorter loops, smoother pavement, or routes with more places to stop.
Gradually increase the distance or try a different trail surface as your comfort grows. Ride with a friend or family member if you enjoy company, but choose partners with a similar pace. You can also join a beginner-friendly community ride to learn about nearby parks.
The best local park rides are not always the longest or fastest. They are the ones that fit your schedule, abilities, and interests. With a reliable bicycle, a suitable route, and a thoughtful approach to safety and etiquette, you can turn nearby parks into enjoyable destinations for regular cycling adventures.